
LET'S SHAPE | LET'S CHANGE | LET'S REDEFINE THE INDUSTRY.
Write your awesome label here.
Write your awesome label here.
Write your awesome label here.
INSTRUCTOR AREA
WELCOME
EQUIPMENT
WRITE SCRIPT
AI REVIEW (OPTIONAL)
RECORD VOICEOVER
[FOR INSTRUCTORS]
SETUP
A. SOFTWARE / HARDWARE
- You'll need:
- Microsoft Word.
- A microphone, which I will ship to you.
- Screen recording program that can capture your screen and audio. Microsoft has a free recorder. I personally prefer SnagIt Capture.
B. QUICK BIO
- Here is a sample bio you can copy an make your own.
- Please include a LinkedIn link to your profile if you would like that to be shown on our Instructor's page.
- Upload your bio here: My Bio Upload
C. NEW HEADSHOT
- Your headshot for MeyerFire University needs to be recent.
- That's OK - because this is your opportunity to get that nice professional headshot that you haven't done in ten years... yes it's been that long : )
- The only rule for our headshot is that it needs to have a solid color light or white background.
- If you don't have a professional headshot image within the last two years, then we will pay you to go get one at JCPenny Photos (yes they're still around). Generally they have Groupons for digital image(s) and a photo shoot for $40 or less: JCPenny Photos with Lifetouch
D. PAYMENT INFO (TO GET PAID)
- If you're US-based: Email Joe this W-9 Form completed, with a mailing address, and your shirt size.
- If you're outside the US: Email Joe your mailing address, the email address you use for PayPal, and your shirt size.
LINKS & ACTION ITEMS:
[FOR INSTRUCTORS]
WRITE OUT THE SCRIPT
- Let's take the outline and turn it into a loose script.
PARTS OF THE SCRIPT
- Introduction (What did we cover last time? What will we talk about today?)
- Body Blocks (Main body of the script)
- Summary (Recap the most-important takaways)
- Outtro (I'm NAME, this is MeyerFire)
DOs
-
Add stories, examples, and details that are important or relevant to you.
-
Share your personality.
-
Make it fun.
-
Write and speak as if you're talking to a close friend.
-
Make it accessible to new audiences.
-
When you use big or technical terms, slow down and define what those mean, and reiterate what they mean in plain-speak.
-
Use active voice, for example, "I want to eat ice cream now."
-
Use humor as you see fit.
-
Teach in a way where you're actually helping the person you're talking to—for instance, what would you tell the person in the cube next to you?
-
Have fun.
-
Know that what you work on will be reviewed and improved.
-
Just focus on the script content at this stage.
-
Turn the Outline into as rough or as detailed of a Script as you'd like. We'd prefer at this stage that it's actually scripted, not bullet points.
DON'Ts
-
Don't talk in "hypotheticals" or "theories."
-
Don't talk in "hypotheticals" or "theories."
-
Don't be a monotone engineer-type that does webinars.
-
Don't talk like fire protection sucks.
-
Don't write and speak as if you hate the person watching.
-
Don't use big words to sound smart. Don't do a technical-term "drive-by shooting." Stop and explain terms that might not be known.
-
Don't use passive voice, like "the ice cream may want to be eaten by me now."
-
Don't use profanity or belittle anyone.
-
Don't talk at a "30,000 ft" level where you don't actually say anything that could help someone.
-
Don't be boring.
-
Don't worry about perfection or the quality of what you're producing; our team (Joe included) will give feedback and make sure that the content will end up at a very high quality.
-
Don't worry about speaking and recording audio... we haven't even gotten there yet!
-
Don't worry about trying to hit perfection. It won't be, that's 100% OK.
USING AI FOR DRAFTING SCRIPTS (OPTIONAL / USE WITH CAUTION)
- When writing out scripts, these tend to come out better when written the old-fashioned way (typing original content as you would speak it).
USING AI FOR SCRIPT DRAFTS - There are plenty of things that ChatGPT does well, but it (and other AI) has tell-tale writing style that comes off as inauthentic and can be overly grandiose. As of this writing in 2024, it's technical proficiency can be misleading when it's unchecked.
- The value that we bring to users, as instructors, is not by quick-creating and hashing ChatGPT content. If that's all we're doing, then we're providing no additional service that a user cannot get from ChatGPT itself. This is no value-add to the user. If we use ChatGPT, we need to do so in a way were the end-result is vetted, accurate, is modified to our own personal voice, includes our own experience and stories, and basically becomes an extension of us - rather than us as an extention of it.
- That being said; if you are going to use ChatGPT to set up your structure anyways, or put together an initial draft, try using this overall structure as guidance. Triple-click and Copy this prompt, and then copy and paste your outline into the same prompt.
[Writing style guideline: Act as an engineering instructor
who is developing fire protection training for industry professionals. The
industry professionals are already familiar with construction and many things
about the fire protection industry. We are providing training segments in
audible form which are between 5 and 15 minutes in length when spoken at 190
words per minute. We then take groups of segments and form them into a series,
which we call a Course. A course could range from four or five segments to as
many as sixteen segments. Below is the title for all the segments in this
series, the instructor of this segment, the title for this segment, and a rough
outline of content for this segment. Please acknowledge that you have received
this content with a simple acknowledgement of “OK. Got it.”]
- Paste the above prompt and your outline for the segment into the same prompt. Press enter.
Now, have ChatGPT generate a draft script by triple-clicking and Copy this prompt:
[Guideline: You are now to write a script for this segment between 5 and 15 minutes long (when spoken at 190 words per minute). Take the information that was provided in the last prompt, and develop it into a script. Writing Style: Write in a way that is both informative and entertaining. Write in a conversational, relatable, yet professional style. Use natural language and phrasing that a real person would use in a professional conversation. Be concise. Write at a high school level. Do not overly inflate the importance of a topic, or overly dramatic. Do not write in generalities, be euphemistic, vague, impressionistic, or impressionistic. Provide specific details or examples. Do not simply state the importance of something; rather, provide context and details that are specific unambiguous. Do not use dramatic adjectives. Do not use dramatic adjectives like “we took a deep dive”, instead, just say “we took a dive”. Instead of saying “this critical process”, just say “process”. Use tame adjectives, not dramatic or embellished ones. We only want factual information. List the steps involved, or the process, or technical explanation, without elaborating on their importance. Avoid prose that simply elaborates on the importance of something. Exclude unnecessary information. The script should take the form of individual blocks that operate like mini-topics or mini blocks of related content. I’ll simply refer to these as Blocks. The Blocks should be in the form of Title, Introduction, Main Point, then multiple Body blocks (as many as necessary), and ending with a Summary block and Closing. The Title block should simply be the title of the segment only. It should have an ALL CAPS subheader of TITLE. The Introduction block should be five sentences or less. It should have an ALL CAPS subheader of INTRODUCTION. If it is the first segment of the series, then we should introduce the series first and what the series is going to cover. If this is not the first segment in the series, then the introduction should start by saying what the last segment was about, and what we’re going to cover in this segment. Next is the multiple body blocks of the content. A block will have multiple paragraphs, but a block should generally not be less than 100 words or more than 200 words. If it takes longer to explain a topic in a block, then create multiple blocks. Create as many body blocks of content as is necessary to answer the topic. Include analogies or stories in order to illustrate a concept where it would be natural or appropriate to do so. For each block in this portion of the segment, provide a subheader in ALL CAPS that describes what is being conveyed in that block. The first sentence in each block should introduce what will be talked about in that block. The last sentence in each block should transition to the next block topic. Continue with as many block segments as you need to explain the topic, with subheaders in ALL CAPS for each block. For the Summary block, first re-introduce the title of the segment, or re-ask it as a question if the title of the segment is a question. Then, in one to four sentences, summarize what was taught as part of this segment. This should be a simplified summary of the content in this segment. Then, introduce what will be discussed in the next segment. If this is the last segment in the Series, then provide a recap for the series as a separate block where you describe what was covered as part of this series overall. Then, provide a closing that reads “I’m [Instructor Name], this is MeyerFire University.” Provide a subheader in ALL CAPS that simply says “SUMMARY” for this last summary block.]
- Revise and rewrite the script to make it your own.
- Whenever you save the file, save it as #####.## - Script - v1 where the ##### is your series number followed by the module. For example, the second module in series FX001 would be FX001.02 - Script - v1.
- When we adapt and update and edit scripts in the future, we'll bump the version number up one number (such as changing this to FX001.02 - Script - v2. Please stick to this format so that our auto-update processes work correctly.
[FOR THE TECHNICAL EDITOR & JOE]
AI REVIEW
AI REVIEW
- In this step we're going to run our script through a specific ChatGPT prompt.
- Here, we are looking for ways to improve our storytelling and improve the overall listener's experience.
- Use ChatGPT 4.0 or higher.
1. Triple-click to Copy the following prompt:
2. Paste the copied text into a new ChatGPT prompt, and press enter to submit.
3. ChatGPT will acknowledge the prompt, and then ask you for your script.
4. Copy and Paste your script into ChatGPT.
5. Review the feedback and ideas.
6. Tweak or update your script as-you-see-fit best based on the tips provided by the machines.
The goal here is to save time overall in peer review. Many of these tips and ideas are things we've used to improve our storytelling and be more engaging and more helpful for the user.
7. Save the script locally.
Whenever you save the file, save it as #####.## - Script - v1 where the ##### is your series number followed by the module. For example, the second module in series FX001 would be FX001.02 - Script - v1.
8. Upload the finalized script(s) using the top-right link for peer review.
Thank you!
[FOR INSTRUCTORS]
SCRIPT RECORDING
- Script recording happens after your scripts have been reviewed and approved.
- This is the most intimidating part for some people, but I'll start off by saying - this can be really really fun! And it doesn't have to be hard.
- When using a Blue Yeti to record:
- (1) make sure that you're using the upside-down-heart mode on the back of the microphone, not the circle.
- (2) record about 2-inches from the microphone to your mouth.
- (3) record into the front face of the microphone.
LINKS & ACTION ITEMS:
DOs
-
perhaps the #1 rule - SMILE - when you're speaking. It'll show through on the audio.
-
use a "speaking" voice, not a "reading" voice. Imagine that you're explaining all of this to your very close friend. Talk like that!
-
record one long audio segment for each module. If you mispronounce a word, trip-up, or struggle with a sentence, KEEP GOING! When this happens, all you have to do is say "I'm going to re-do that sentence", and then start the last sentence over again and then KEEP GOING.Do not do multiple takes for the entire segment. Our video team is EXCELLENT and we have 2 editors and 2 reviewers (including Joe) who will make sure it sounds seamless on the other end. Seriously, it'll sound professional.
-
if your audio is 12-minutes long for 3-minutes of content because of repeating sentences, that's 100% OK. Send it in.
-
have fun and be you.
DONTs
-
don't scowl when you read (ya gotta smile!! : ) )
-
don't use a "reading" voice without any passion. The person you're explaining it to actually likes you! You're their friend! And if not, they'll be your friend soon!
-
do not - do not - do not re-record your whole segment. You absolutely, 100%, do not need a whole perfect take. If you trip up, just start that sentence over and then KEEP GOING. Please please please, I beg you.This will end up saving you way more time, and the end result will still be great.
-
do not re-record whole segments because you fear you did too many takes. Your time is valuable, I promise we will do just fine on the back-end and make it come out great.
-
don't try to be someone else. you have a role to play in this world and it's the one you define. be you; the world is better for it.
[FOR ALL]
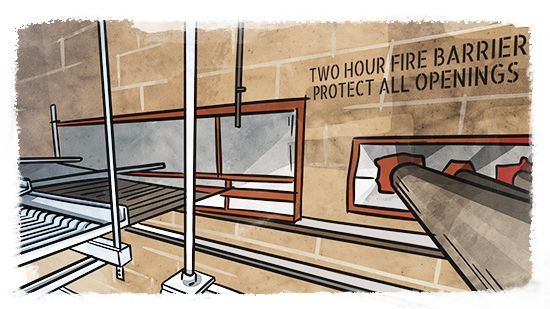
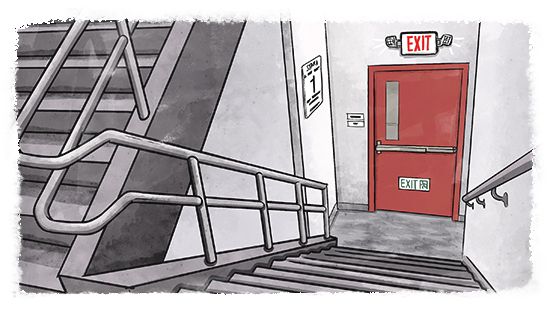
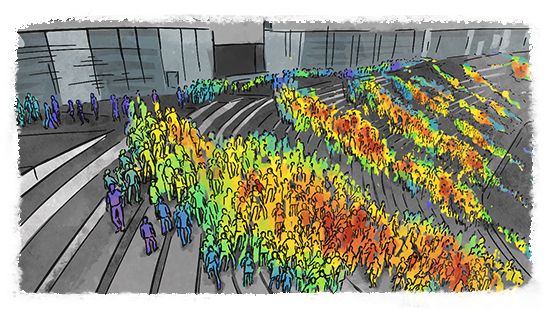
ABOUT THE FIRE PROTECTION FIELD
We consider all kinds of things - how people egress, how the fire alarm system is designed and installed, how the fire sprinkler system is designed and installed, whether there are enough exits, and whether they're in the right location. We think about extinguishers and smoke control and all kinds of special hazards that would risk life or property.
OUR TARGET AUDIENCE
GOAL FOR OUR CONTENT
OUR APPROACH
We're on the opposite end - we do as much work as we can (preparation, writing, video editing, illustration, animation) to make the absolute best use of our users' time.
If they watch an hour of our content, it is packed wall-to-wall with helpful "meaty" information. We don't waste time, and we bring things to life visually. You can get a sense of what we do on our courses page. It's all scripted, recorded, polished, and edited for a crisp, online, on-demand experience.
We also supplement that with PDF resources, simulations, exercises, some 'video game' like experiences, and an app (iOS and Android) that supports all of this.
Despite the company being very small, we have a ton of momentum and we have a solid group of A-Player freelance talent that is the top of the field in their area, just like yourself.
COURSES & MODULES
(1) Introduce a concept,
(2) Give helpful resources,
(3) Practice, practice, practice
Some introduction (1) content will be video modules which will answer one specific question.
Helpful resources (2) often include PDF flowcharts, tables, diagrams, or other cheatsheets that a learner can keep and put into practice immediately.
Practicing (3) can be a quiz, can be a puzzle (crossword, image identification, matching), it can be a plan review, a video game, or a 3D simulation.
We use the term series & courses interchangeably, and modules and segments interchangeably. Here's what those are:
A SERIES (COURSE)
Each series, or course, will contain multiple modules.
The series can be as long or short as necessary to cover a topic. Generally, a series ends up being between 6-15 different modules, and be between 1 and 3 hours of published length.
A MODULE (SEGMENT)
For each module (or segment), we target about 8-12 minutes as the ideal length. This is short and bite-sized. It's OK to be shorter or longer. We have some 4 minute and some 15 minute videos.
If one segment goes too long (over about 15 minutes), we just try to split them into multiple segments.
HOW WE CREATE
After the loose outline, the instructor will usually work on a script. Sometimes these need minor edits, sometimes more.
SCRIPTS FOR A VIDEO
Naturally, the spoken word is less formal than the written word; that's OK here.
After we go step by step through the process of presenting by speaking, we then adapt the content in a more formal way for written word (e-books). This happens in later steps in the process.
Excited to have you on board with our team! We're going to do great things for the industry together.

Our goal is to improve fire protection practices worldwide. We promote the industry by creating helpful tools and resources, and by bringing together industry professionals to share their expertise. MeyerFire, LLC is a NICET Recognized Training Provider and an International Code Council Preferred Education Provider.

Copyright MeyerFire, LLC © 2026
HELP US IMPROVE
Would you mind taking 3 minutes to answer 10 short questions on your PE Prep experience?
PE Exam Feedback
Understanding Use & Occupancy
LS101 | 1.5 Hours

Introduction to Codes & Standards
LS001 | 1.5 Hours


Types of Fire Alarm Systems
FA102 | 1.0 Hour

Layout of Control Equipment
FA111 | 1.0 Hour

Layout of Pull Stations
FA112 | 1.0 Hour
Smoke Detection Coverage
FA113 | 1.0 Hour
Layout of Other Initiation Devices
FA115 | 1.5 Hours

Layout for Visual Notification
FA121 | 1.0 Hours
Layout for Audibility & Intelligibility
FA122 | 1.5 Hours
Introduction to Sprinkler & Standpipes
FX001 | 1.0 Hour
Standards of Sprinkler Design
FX101 | 1.0 Hour

Standards of Standpipe Systems
FX102 | 1.0 Hour

System Types & Layouts
FX120 | 1.5 Hours
Flow Tests
FX130 | 1.5 Hours

Water Supply Evaluation
FX131 | 1.5 Hours


Understanding Obstructed Construction
FX153 | 1.5 Hours

Understanding Unobstructed Construction
FX154 | 1.0 Hour


Layout for Standard Spray Sprinklers
FX173 | 3.0 Hours

The Sprinkler Layout Process
FX174 | 3.0 Hours


Effective Use of Codes & Standards
LS111 | 1.0 Hour
Construction Documents, Part I
DX102 | 1.0 Hour

Types of Analysis
PE101 | 3.5 Hours

Information for Analysis
PE102 | 4.5 Hours
Fire Dynamics
PE103 | 3.5 Hours
Water-Based Fire Suppression
PE104 | 3.0 Hours
Special Hazard Systems
PE105 | 1.5 Hours

Fire Alarm Systems
PE106 | 1.5 Hours
Smoke Control
PE107 | 1.5 Hours
Explosion Prevention
PE108 | 1.0 Hour
Passive Building Systems
PE109 | 1.5 Hours
Means of Egress
PE110 | 1.5 Hours
Human Behavior
PE111 | 1.0 Hour
PE Prep Series Weeks 1-4
PE201 | 2.0 Hours

PE Prep Series Weeks 5-8
PE202 | 2.0 Hours

PE Prep Series Weeks 9-12
PE203 | 2.0 Hours

PE Prep Series Weeks 13-16
PE204 | 2.0 Hours
PE Prep Series Weeks 17-20
PE205 | 2.0 Hours
Know a Student?
Help them get connected with the industry!
https://www.meyerfire.com/blog/how-to-break-into-the-fire-protection-industry